top of page

ISILO 3.0
DO IT YOURSELF
STEP BY STEP
To build this, you will need

1 L295N

2 Arduino

2 Cytron 12v 17RPM 194.4oz-in

1 Aluminium Sheet 2000x1000x5

1 Steel Bar 4x2m

100 Autobloking nut M4

100 Bols 30mm x M4

100 Nut M4

250 Washer M4

Wires

2 Joysticks JYSTK-GM-299

1 315 Mhz RF

1 DC-DC Power Converter 25W

1 Threaded rod M4x1m
Tools that you need

Milling Machine

Drill

3D Printer

Drill
Technical Specifications

3D Desing
BODY DESING
 |  |  |
|---|---|---|
 |  |  |
 |  |  |
 |  |  |
MOTORS AND SUPORTS MOTORS
 |  |  |
|---|---|---|
 |  |  |
 |
STEP 1
Let's Begin
As a first part you need the 3D design of your robot, we use the PTC CREO program for this and then share it with you.

Blueprints construction
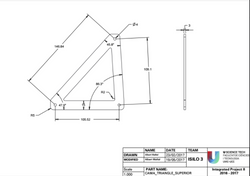 |  |
|---|---|
 |  |
 |  |
 |  |
Robot Scheme

Once you have all the design ready you will begin with the construction of the parts, for this we will use the milling machine. If you do not have a milling machine for the project, you can use the tool you have to cut, to make it easier, we attach the plans with all the necessary measures.
STEP 2
Construction


Here we leave a video of how the milling machine works
We will also use in the construction the 3D printer to create the supports of our motors


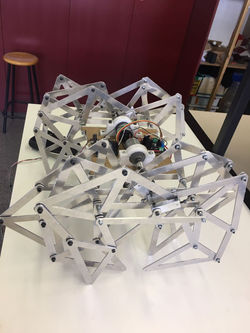
STEP 3
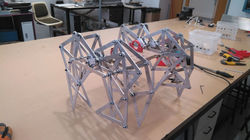
Once you have all the pieces ready, you will begin with the assembly of these, each leg will be assembled as follows:
Assembly


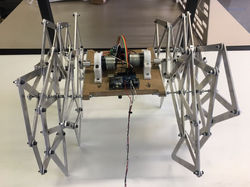
HOW TO MOUNT THE ELECTRICAL COMPONENTS


After having the legs you will begin with the assembly of all the components including the electrical components.


STEP 4
Programming


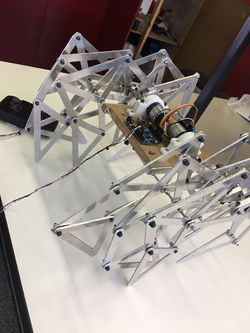
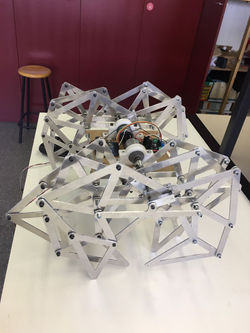
Finally this is our result
 |  |  |
|---|---|---|
 |  |  |
 |
Now your robot is ready
Enjoy it!
bottom of page